
Standard Network Setup Guide
Helix Telecom encourages customers to use a Standard Network Setup. The Standard Network Setup has been tested across many providers with hundreds of customers. Customers who use a Standard Network Setup should experience no connectivity issues or call quality issues. This does not mean a Standard Network Setup will fix 100% of all problems found on every network but should make troubleshooting any remaining issues easier. The Standard Network Setup is not required except for customers who need assistance troubleshooting connectivity issues.
If you prefer to use a different network topology then see the section below labeled Begin Troubleshooting. Helix Telecom does not offer technical support for internal network issues beyond what is found here.
Standard Network Configurations
Standard Network Topologies are below.
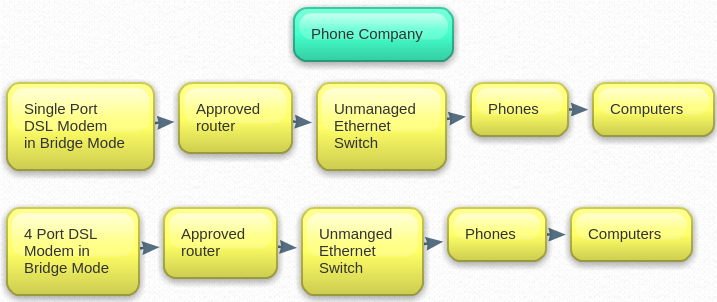
If you obtain internet service from your phone company:
If you obtain internet service from your cable company:
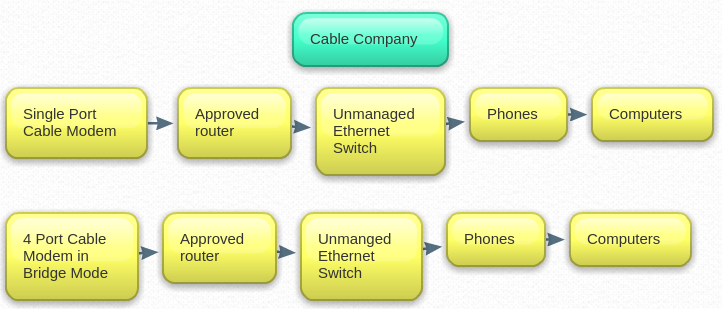
If you are unsure if your modem or router are in Bridge Mode then contact your ISP. Your ISP may also refer to “Bridge Mode” as “Passthrough Mode”.
Begin
The instructions below are designed to help advanced customers who are comfortable with computers and basic networking. Please read the entire Standard Network Setup before proceeding. You should communicate these changes to your IT professional. You should also be prepared to contact Netgear Technical Support (1-888-NETGEAR), your ISP technical support and your IT professional for assistance if you run into trouble.
- Purchase a new Netgear router. These routers are available at most office supply stores for approximately $50.00. For sake of simplicity here is a link to purchase one from Amazon.
- Confirm your ISP modem is in Bridge Mode. This step is usually completed by your ISP.
WARNING: If you have a DSL modem then also ask your ISP if you need to enter PPPOE credentials into your Netgear router. If you must enter PPPOE credentials into your Netgear router then obtain the type of PPPOE credentials (either PPPOE or PPTP), your login and your password. Do not skip this step or the instructions below will cause your internet to stop working.
- Unbox your Netgear router.
- Locate the blue cable found with your Netgear router.
- Disconnect all network cables from the modem supplied by your ISP.
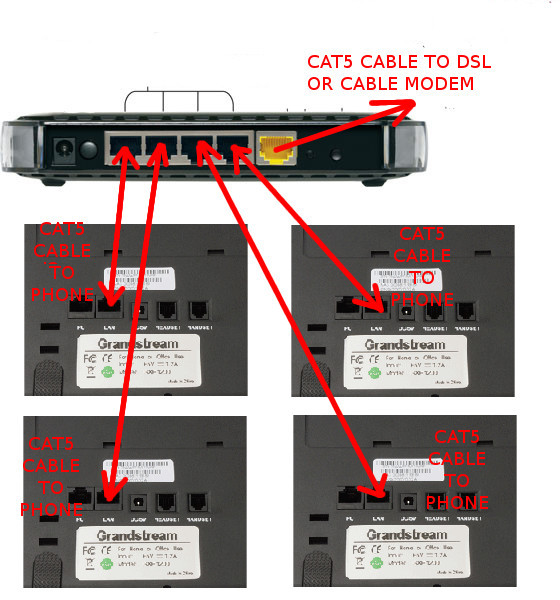
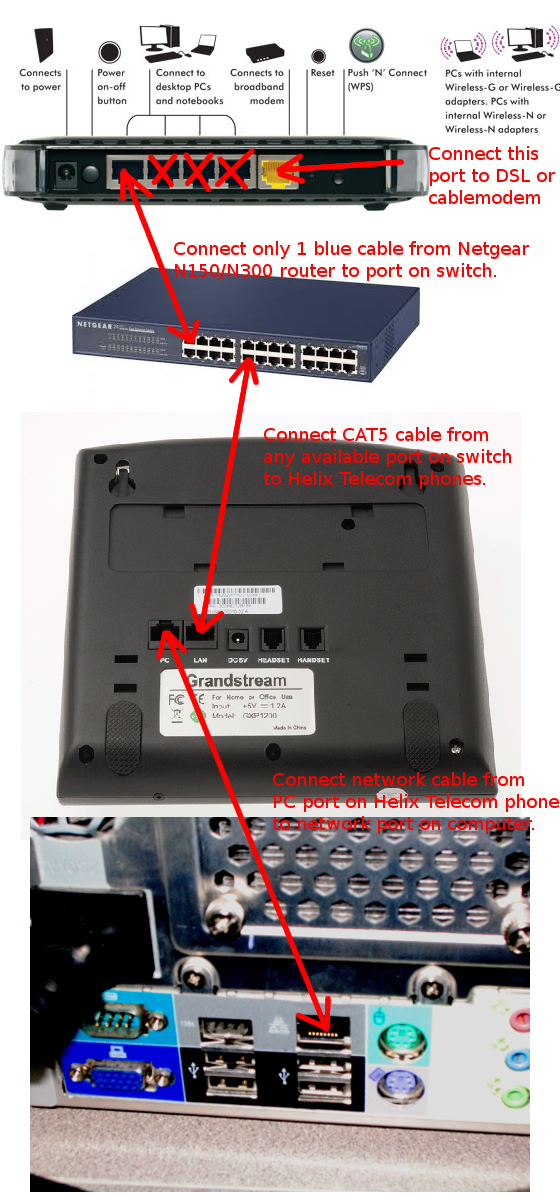
- Connect one end of the blue cable to the modem supplied by your ISP. See images below for common configurations. Clicking the images below to magnify them for easier viewing.
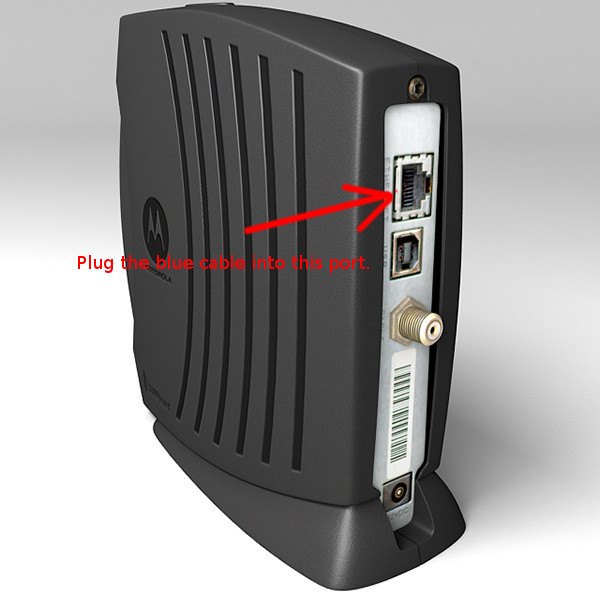

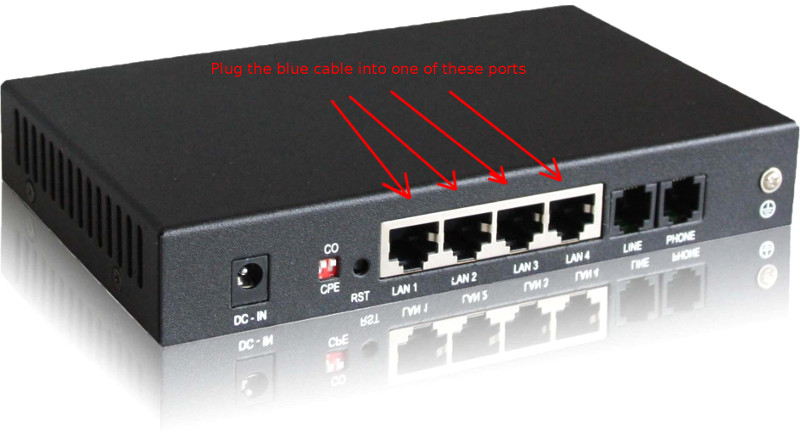
- Connect the other end of the blue cable to the YELLOW port on your Netgear router.

- You will now need to connect your network devices.
- If you have 4 or less network devices then connect them to the 4 LAN ports found on your Netgear router.
- If you have 5 or more network devices then connect a 8, 16, 24 or 48 port switch to your Netgear router.
- Disconnect power from your DSL modem or cablemodem for a period of 10 seconds. Reconnect power. Wait 2 minutes.
- Disconnect power from your Netgear router for a period of 10 seconds. Reconnect power. Wait 2 minutes.
- Disconnect power from your Helix Telecom devices for a period of 10 seconds. Reconnect power. Wait 10 minutes.
- Reboot your computers and other devices.
All devices should be able to reach the internet and your Helix Telecom phones should be ready for activation.
If you would like to further improve the speed of your internet connection and call quality on your Helix Telecom phones we suggest the following changes to your Netgear router.
- From the WAN tab disable DDOS protection.
- From the WAN tab set NAT FILTERING to OPEN.
- From the WAN table disable SIP ALG support.
If you continue to experience difficulty contact a network technician to assist you. Helix Telecom does not provide technical support for internal networks. See Begin Troubleshooting below for more troubleshooting tips.